How to Build Advanced RAG in n8n
Build a production RAG pipeline in n8n with chunking, hybrid retrieval, reranking, and compression.

Build a production RAG pipeline in n8n with chunking, hybrid retrieval, reranking, and compression.
This guide is for developers who want to move beyond basic retrieval-augmented generation and build a stronger, more testable pipeline in n8n. By the end, you will have a workflow plan that covers ingestion, retrieval, reranking, and response shaping with clear places to debug each stage.
You will also know how to choose the right advanced RAG technique for each failure mode, so you can improve recall, reduce hallucinations, and keep prompts focused on the most useful context.
Before you start
Get the latest AI news in your inbox
Weekly picks of model releases, tools, and deep dives — no spam, unsubscribe anytime.
No spam. Unsubscribe at any time.
- n8n account or self-hosted n8n instance
- n8n Docs: https://docs.n8n.io/
- n8n GitHub repo: https://github.com/n8n-io/n8n
- Node.js 20+
- Access to an LLM provider API key
- Access to a vector database such as Postgres with pgvector, Pinecone, or Qdrant
- Documents to index, ideally with metadata such as author, topic, and timestamp
- Optional: a reranking model or API for post-retrieval ranking
Step 1: Map your RAG failure points
Your first outcome is a pipeline plan that matches techniques to the problems you actually have. Start by deciding whether the main issue is poor recall, hallucinations, noisy context, weak domain knowledge, or repetitive answers. That choice determines whether you need better chunking, hybrid retrieval, reranking, or contextual compression.
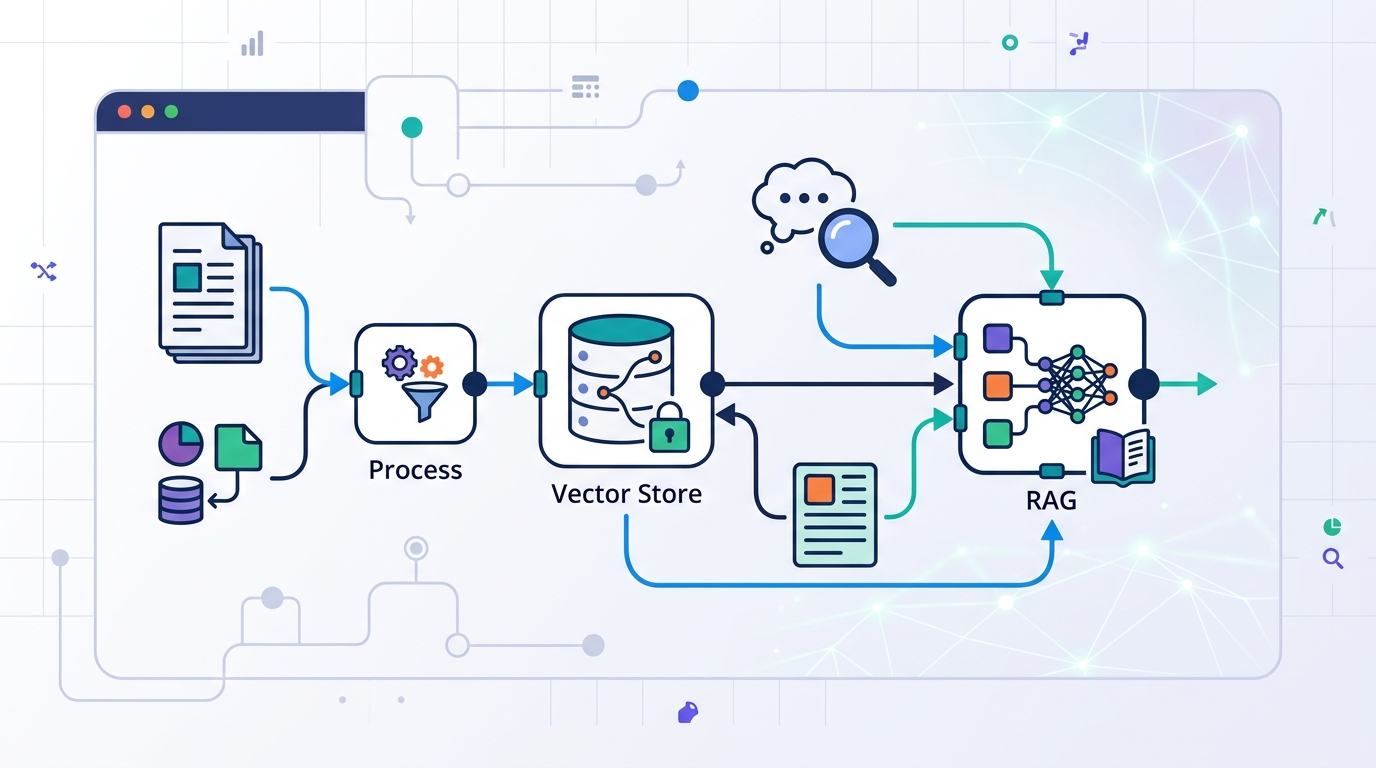
Write down the stages you need: ingestion, chunking, embedding, retrieval, reranking, compression, and generation. In n8n, each stage becomes a visible node, which makes it easier to test one change at a time instead of rebuilding the whole workflow.
Verification: you should see a stage-by-stage diagram or checklist with a named fix for each failure mode.
Step 2: Clean and chunk your source documents
Your second outcome is indexed content that is easier for the model to retrieve accurately. Clean the text first by removing duplicates, boilerplate, and low-value sections, then split it into chunks that preserve meaning. The source article highlights recursive splitting, sliding windows, and hierarchical chunking as practical options.
// Example chunking approach in a preprocessing step
// 1. Normalize text
// 2. Split by headings, paragraphs, and sentences
// 3. Add overlap for context continuity
// 4. Store chunk metadata

const chunk = {
  text: cleanedText,
  metadata: {
    author: 'team',
    topic: 'RAG',
    timestamp: '2026-05-07'
  }
};
Verification: you should see smaller chunks with useful metadata attached, and the same source should produce consistent chunk boundaries across runs.
Step 3: Enrich embeddings with metadata
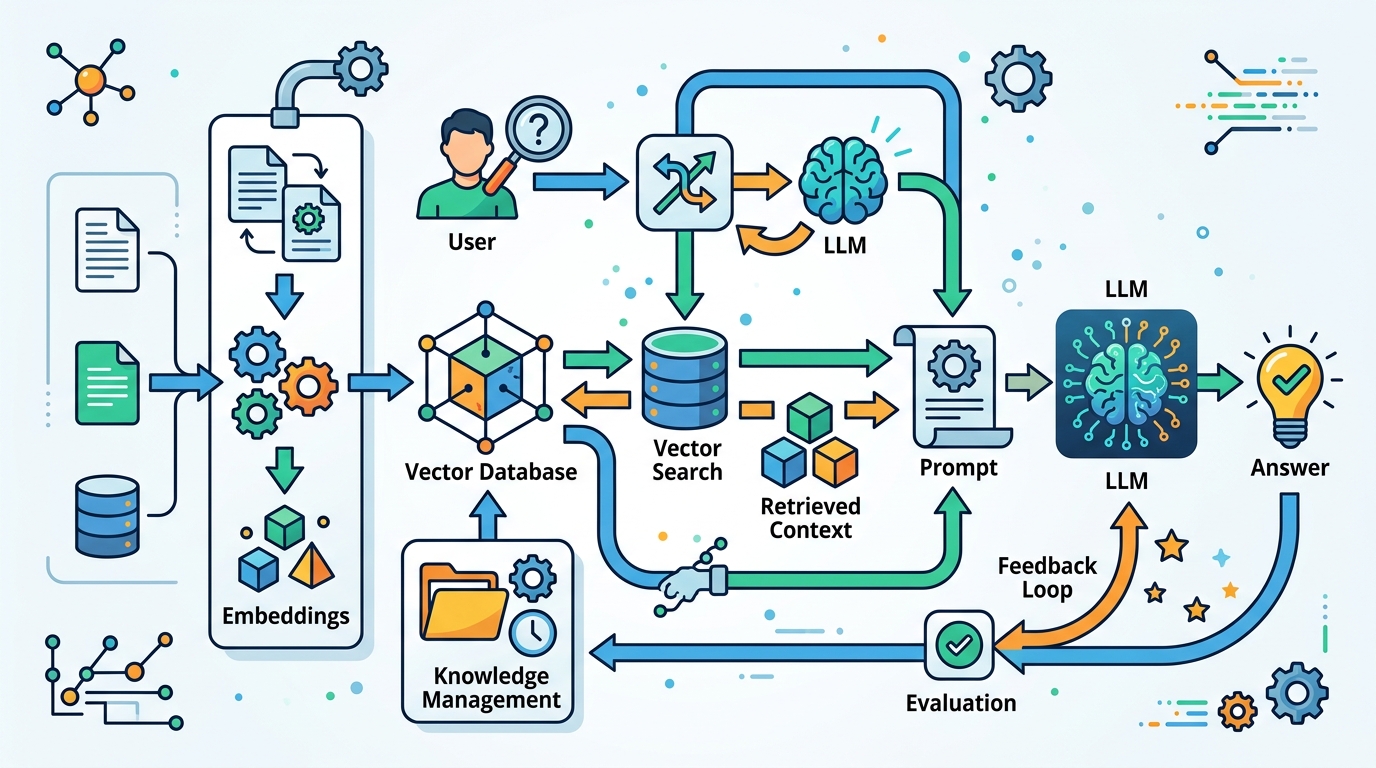
Your third outcome is a searchable index that can filter and rank by meaning plus context. Generate embeddings for each chunk, then attach metadata such as source, document type, recency, and topic. This supports self-query style retrieval, where metadata helps the system narrow results before the LLM reasons over them.
In n8n, keep ingestion separate from retrieval so you can re-embed or re-chunk without touching the query path. If your use case changes, you can update the indexing workflow and keep the rest of the pipeline intact.
Verification: you should see each vector record include both the embedding and metadata fields, and you should be able to filter by at least one metadata key.
Step 4: Combine dense and sparse search
Your fourth outcome is a retrieval layer that can handle both semantic meaning and exact keyword matches. Hybrid search pairs dense vector search with sparse keyword search, which helps when a user phrase is exact, technical, or ambiguous. This is one of the most practical upgrades over naive RAG.
Build this in n8n as two retrieval branches that feed a merge step. One branch handles semantic similarity, while the other handles keyword relevance. After that, combine the candidate sets so the next stage can evaluate a broader pool of evidence.
Verification: you should see results from both search styles, and the merged list should include at least one result that each individual method would likely miss.
Step 5: Add reranking and compression
Your fifth outcome is a shorter context window with the most relevant evidence at the top. After retrieval, send the candidate chunks to a reranker so a specialized model can sort them by query relevance. Then apply contextual compression to remove low-value text before the final prompt reaches the LLM.
This stage matters because even good retrieval can return too much text. Compression lowers prompt size, reduces noise, and can cut cost while keeping the answer grounded in the strongest sources. If the first pass still looks weak, add corrective RAG logic that re-evaluates the answer before it is returned.
Verification: you should see the top-ranked chunks move closer to the query intent, and the final prompt should be noticeably smaller than the raw retrieval output.
Step 6: Validate sources before generation
Your sixth outcome is a response path that can explain where each claim came from. Add citation and source verification so the system checks whether each statement is supported by the retrieved material. If a claim is unsupported, the workflow should remove it or trigger another retrieval pass.
For complex questions, you can also use multi-stage retrieval or multi-hop retrieval. That lets the workflow gather evidence in layers, then connect facts across multiple documents before generating the final answer. This is especially useful when one source does not contain the whole story.
Verification: you should see citations linked to source chunks, and unsupported claims should be flagged before the final response is sent.
| Metric | Before/Baseline | After/Result |
|---|---|---|
| Prompt size | Raw retrieved context | Compressed context before generation |
| Retrieval quality | Single dense search | Hybrid search plus reranking |
| Answer reliability | No source check | Citation and source verification |
| Pipeline flexibility | Monolithic RAG flow | Visible node-by-node workflow |
Common mistakes
- Using one big chunk size for every document. Fix: test recursive or hierarchical chunking and add overlap where context breaks.
- Relying only on dense embeddings. Fix: add sparse keyword search so exact terms and technical names still match.
- Sending too much raw context to the LLM. Fix: add reranking and contextual compression before generation.
What's next
Once this workflow is stable, extend it with agentic routing and multimodal retrieval so the system can choose tools dynamically and work with images, audio, or video as well as text. From there, you can compare answer quality across versions and keep tuning each node without losing visibility into the full pipeline.
// Related Articles
- [AGENT]
Perplexity should build Teammate as a coding agent, not a copilot
- [AGENT]
HP adopts OpenAI Frontier across global operations
- [AGENT]
Build a production vector DB for RAG
- [AGENT]
Ornith-1 turns agent coding into a server
- [AGENT]
Crypto AI agents are useful, but only for narrow workflows
- [AGENT]
AI Agents in Crypto: 2026 Protocol Guide