How to Build Rust GPU Kernels with cuda-oxide
Set up cuda-oxide to compile Rust GPU kernels into PTX and run them on NVIDIA GPUs.

Set up cuda-oxide to compile Rust GPU kernels into PTX and run them on NVIDIA GPUs.
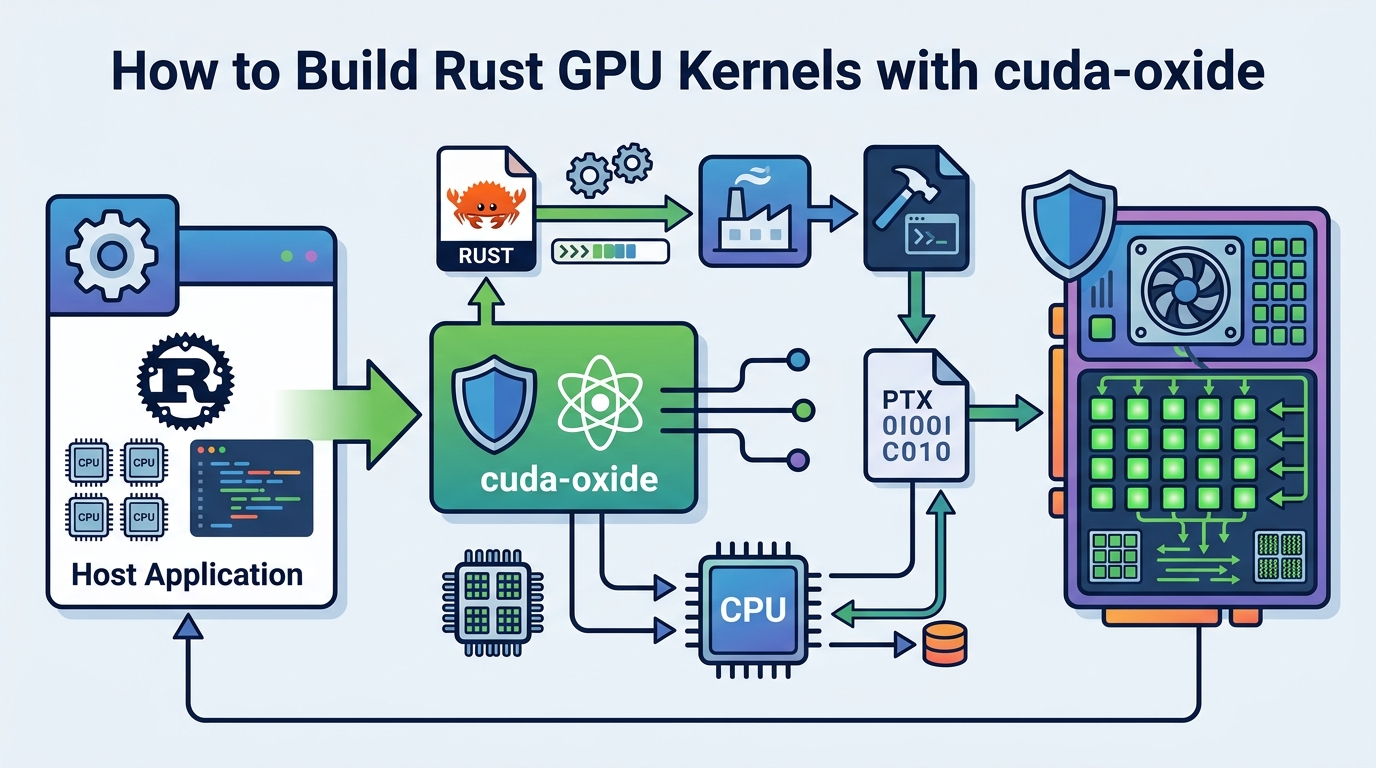
If you are a Rust developer who wants to write SIMT GPU kernels without switching to C++ or a DSL, this guide shows you how to get NVIDIA’s experimental cuda-oxide GitHub repository and the companion docs working end to end. By the end, you will have a local build that emits a host binary plus PTX, runs the vecadd example, and lets you inspect the compilation pipeline.
This is a practical setup guide, so each step ends with a concrete result you can verify. You will install the right Rust nightly, LLVM, and Clang versions, confirm your CUDA toolchain, and then run your first kernel build.
Before you start
Get the latest AI news in your inbox
Weekly picks of model releases, tools, and deep dives — no spam, unsubscribe anytime.
No spam. Unsubscribe at any time.
- Linux only, tested on Ubuntu 24.04
- Rust nightly pinned by the repo, currently nightly-2026-04-03
- rust-src and rustc-dev Rust components
- CUDA Toolkit 12.x+
- LLVM 21+ with NVPTX backend support
- Clang 21 or libclang-common-21-dev
- Git
- NVIDIA GPU with a working CUDA driver
Step 1: Verify your CUDA and GPU toolchain
Goal: confirm your machine has a compatible NVIDIA stack before you install the compiler backend. cuda-oxide depends on a CUDA-capable Linux environment, and the article notes that LLVM 21 is required for newer GPU features such as Hopper and Blackwell support.

nvcc --version
nvidia-smi
llc-21 --version | grep nvptx
You should see a CUDA Toolkit 12.x version from nvcc, your GPU listed in nvidia-smi, and an NVPTX line in llc-21 output. If NVPTX is missing, stop here and install an LLVM build that includes the GPU backend.
Step 2: Install the pinned Rust nightly
Goal: match the repository’s compiler expectations so the custom codegen backend can hook into rustc internals. cuda-oxide uses nightly Rust plus rust-src and rustc-dev, and the repo pins nightly-2026-04-03 for reproducible builds.
rustup toolchain install nightly-2026-04-03
rustup component add rust-src rustc-dev --toolchain nightly-2026-04-03
rustup show
You should see the nightly-2026-04-03 toolchain installed and selected. If rustc-dev is missing, the backend will not be able to use compiler APIs, so fix that before moving on.
Step 3: Install LLVM 21 and Clang 21
Goal: provide the external llc binary and the libclang headers that cuda-oxide needs during build and code generation. The backend emits textual LLVM IR and then hands it to llc, while bindgen needs Clang’s resource headers to find standard includes.
sudo apt update
sudo apt install llvm-21 clang-21 libclang-common-21-dev
llc-21 --version | grep nvptx
clang-21 --version
You should see both LLVM 21 and Clang 21 installed, plus NVPTX in llc-21 output. If bindgen later complains about stddef.h not found, it usually means you installed only a runtime libclang package instead of the full Clang headers.
Step 4: Clone cuda-oxide and install cargo-oxide
Goal: get the repo, the cargo subcommand, and the codegen backend in place so Cargo can route kernel builds through cuda-oxide. The project uses cargo oxide build, run, debug, and pipeline commands to drive the full Rust to PTX flow.
git clone https://github.com/NVlabs/cuda-oxide.git
cd cuda-oxide
cargo install --git https://github.com/NVlabs/cuda-oxide.git cargo-oxide
cargo oxide doctor
You should see cargo-oxide install cleanly, then a doctor report that checks Rust, CUDA, LLVM, Clang, and the backend binary. Any red item in doctor output should be fixed before you try to compile a kernel.
Step 5: Run the vecadd kernel example
Goal: build and execute the sample GPU kernel so you know the whole pipeline works. vecadd adds 1,024 f32 values on the GPU and validates the result on the host, which makes it an ideal first smoke test.
cargo oxide run vecaddYou should see a success message that all 1,024 elements are correct. That confirms the host binary launched, the device code compiled to PTX, and the CUDA driver loaded the generated kernel.
Step 6: Inspect the Rust to PTX pipeline
Goal: verify that cuda-oxide is really compiling through Stable MIR, Pliron, LLVM IR, and PTX rather than hiding the steps. This is useful when you are debugging compiler behavior or validating what the backend emits at each stage.
cargo oxide pipeline vecadd
cargo oxide debug vecadd --tui
You should see a stage-by-stage trace from Rust MIR through dialect-mir, mem2reg, dialect-llvm, LLVM IR, and finally PTX output. The debug command should open a TUI for cuda-gdb, which confirms the project can hand off device debugging when needed.
| Metric | Before/Baseline | After/Result |
|---|---|---|
| Compilation target | Rust source plus separate CUDA flow | Single-source Rust emits host binary and PTX |
| Kernel build path | C++/CUDA or a DSL wrapper | Rust kernel code compiled directly to PTX |
| Toolchain requirement | Mixed Rust, C++, and CUDA tooling | Rust nightly, LLVM 21, Clang 21, CUDA Toolkit 12.x+ |
Common mistakes
- Using an older LLVM build. Fix: install LLVM 21 or later, and confirm llc-21 --version shows NVPTX support.
- Installing only libclang runtime packages. Fix: install clang-21 or libclang-common-21-dev so bindgen can find the resource headers.
- Skipping rustc-dev or the pinned nightly. Fix: switch to nightly-2026-04-03 and add rust-src plus rustc-dev with rustup.
What's next
Once vecadd works, try writing your own #[kernel] function, then use cargo oxide pipeline on it to inspect how monomorphized Rust, device intrinsics, and barrier semantics survive the trip to PTX. From there, you can explore the cuda-device crate, the compiler backend source, and the project’s coordination with rust-cuda for broader Rust GPU development.
// Related Articles
- [TOOLS]
Vector Databases: How AWS Explains Them
- [TOOLS]
How to Choose a Vector Database in 2026
- [TOOLS]
Vibe Research: AI Tools for Faster Research
- [TOOLS]
Why AWS’s repository-wide security scanner matters more than faster S…
- [TOOLS]
Why Docker’s microVM sandboxes are the right move for AI agents
- [TOOLS]
Why Gemini API pricing is cheaper than it looks